Incase you haven’t heard about it yet, Kenneth Auchenberg — Program Manager on the VSCode team recently released an incredible extension to the marketplace, allowing you to run & debug not only Angular applications, but any type of application, all inside of the VSCode IDE!
In this post we’re going to be talking about getting things wired up with the Angular-CLI specifically - but keep in mind, you can use any framework (or none at all) and still use Browser Preview!
Getting Setup
For the purpose of this demo, let’s start with a newly created Angular-CLI application, but you could go ahead and use browser preview with an existing Angular App as well!
// let's get the latest CLI just incase :)npm i -g @angular/cling new angularcli-vscode-debugcd angularcli-vscode-debug && code .Ok great, now that we have Angular setup out of the way, let’s make sure we have the right VSCode extensions.
VSCode Marketplace extensions needed


Let’s head over to the VSCode marketplace and download the new Browser Preview extension and make sure we have Debugger for Chrome as well (as it’s required for browser preview).
VSCode Launch.json Configuration
Open up VSCode again and make sure we have the required launch.json configurations.
Head over to the Debugging Tab on the left, and add a new Browser Preview configuration.


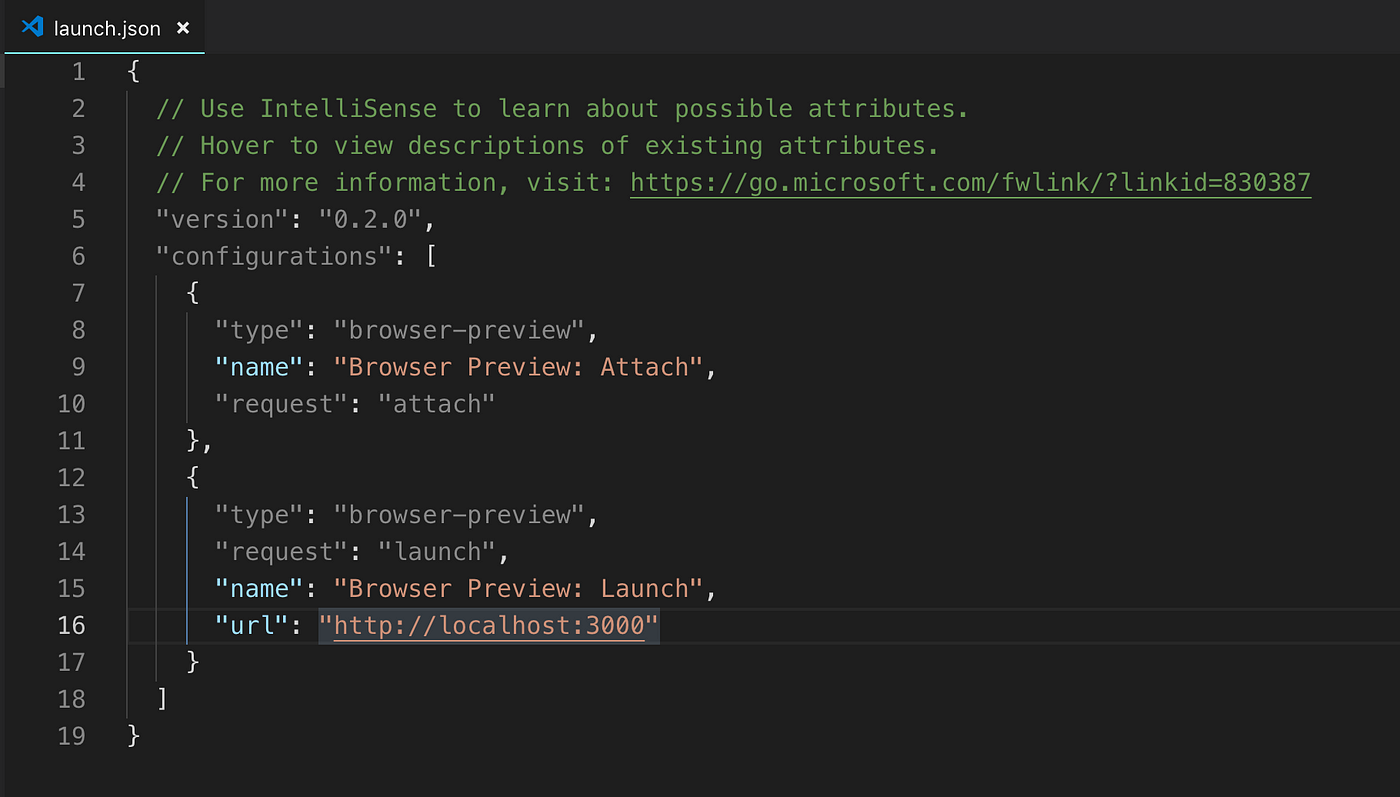
This will create a baseline Launch.json for us, but we’ll want to make a few small tweaks so that it works with Angular.
 Baseline launch.json configuration for VSCode Browser Preview.
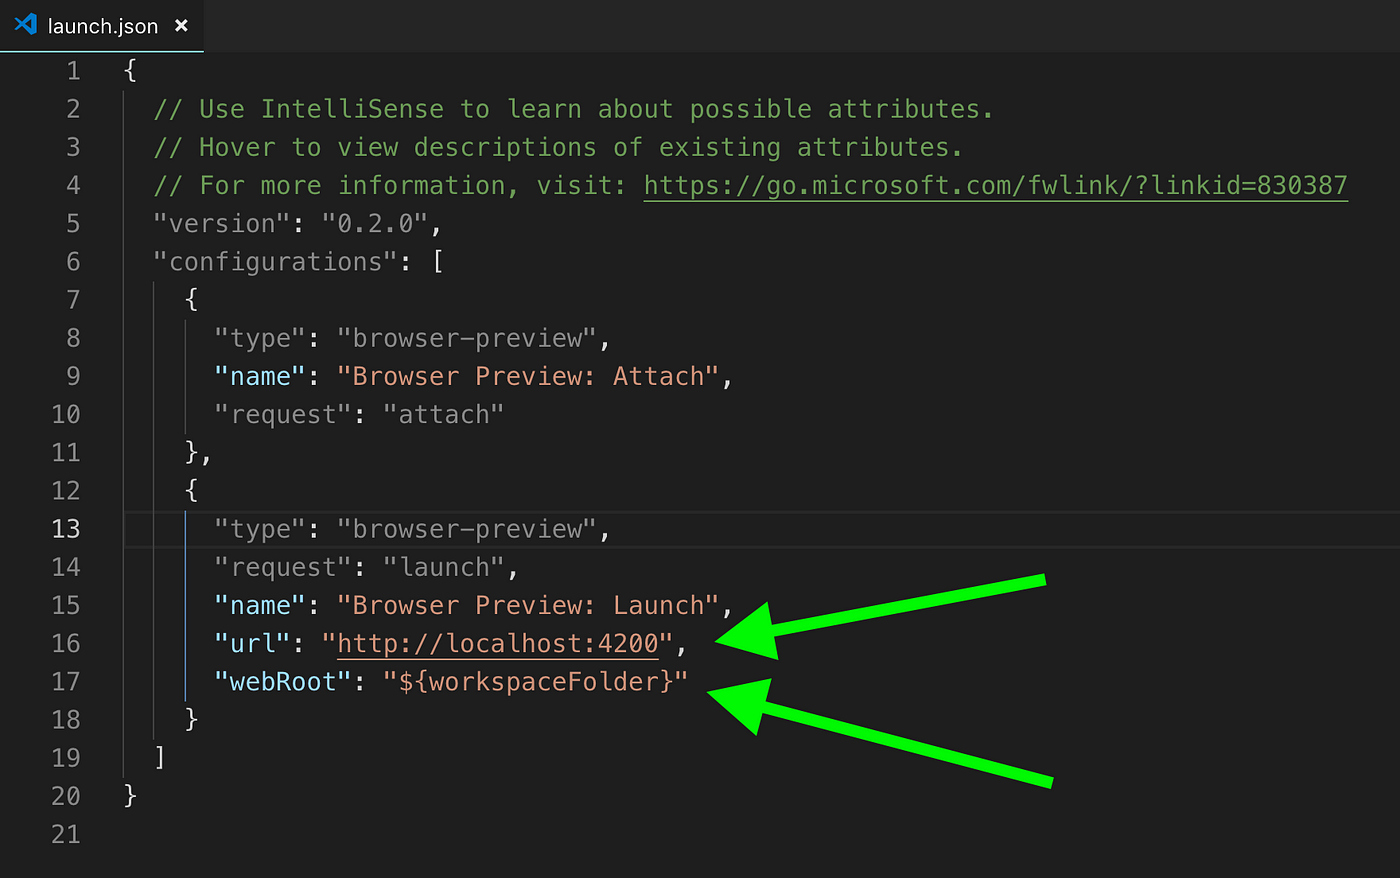
The first thing you might of noticed is that by default it’s pointing to "http://localhost:3000" and the Angular-CLI runs (by default) on port 4200,so let’s make sure we change that here.
But that alone won’t work, we also need to let VSCode know what our webRoot is. The webRoot tells VSCode where our files are being served from. In the case of the Angular-CLI, it’s simply ${workspaceFolder}.
 Setting up Angular-CLI launch.json for Browser Preview.
With those two lines added, you’re all set and ready to Launch!

Running Browser Preview
Note: Make sure you are running your Angular application in a terminal before launching the VSCode debugger with browser preview.
Fire up your Angular app via npm start or ng serve, then open up the Debugging sidebar inVSCode, and make sure to select:
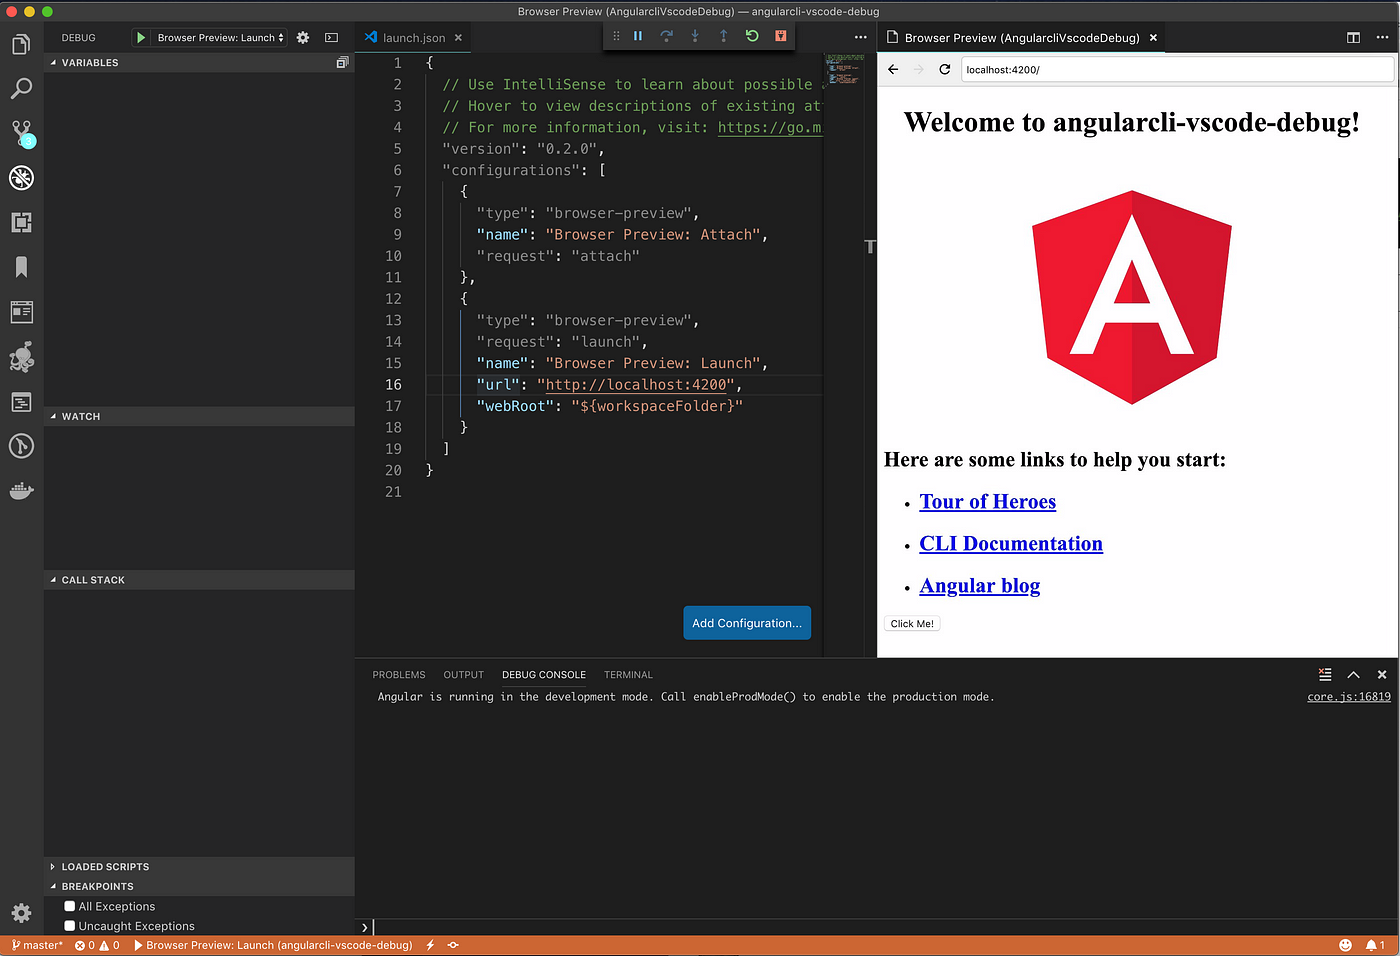
Browser Preview: Launch and hit Start Debugging (or F5) to try it out for yourself!
You should see our starter Angular app open up right beside your code! 🔥

Debugging with Browser Preview
Now that you have all the magic setup, let’s test out debugging real quick!
We’re going to add a little button to our app.component.html template and a method to handle the click events.
<!-- app.component.html --><button (click)="testDebugging()">Click Me!</button>// app.component.tstestDebugging() { this.title = 'browser preview works!!'; // set a breakpoint here}Note, any changes you make to these files and Save will automatically reload in the browser preview since the angular-cli is handling all the recompilation/etc.
Set a breakpoint on the left hand gutter inside of that testDebugging() method.
When the right preview window reloads, go ahead and click on that button — and watch the magical debugging in action 🙌

Browser Preview breakpoint in action
And there you have it! We can see by clicking that “Click Me” button on the right side Browser Preview, it immediately hit our breakpoint in the code.
I hope that helps you get everything setup, have fun hacking away!
Angular Demo Repo
https://github.com/DevHelp-Online/angularcli-vscode-browser-preview
VSCode Browser Preview Repo
https://github.com/auchenberg/vscode-browser-preview
Learn NestJS - Official NestJS Courses 📚
Level-up your NestJS and Node.js ecosystem skills in these incremental workshop-style courses, from the NestJS Creator himself, and help support the NestJS framework! 🐈🚀 The NestJS Fundamentals Course is now LIVE and 25% off for a limited time!
🎉 NEW - NestJS Course Extensions now live!
- NestJS Advanced Concepts Course now LIVE!
- NestJS Advanced Bundle (Advanced Architecture and Advanced Concepts) now 22% OFF!
- NestJS Microservices now LIVE!
- NestJS Authentication / Authorization Course now LIVE!
- NestJS GraphQL Course (code-first & schema-first approaches) are now LIVE!
- NestJS Authentication / Authorization Course now LIVE!


