- Part 1: Deploy NestJS to Zeit Now.sh (this article)
- Part 2: Deploy NestJS to Azure Functions
- ... more to come ...
In this article we'll be looking at how to deploy NestJS applications to the cloud platform Zeit Now in only a few minutes!
See the "Hello World" NestJS + Zeit Now live demo:
NestJS-Zeit.Now.sh
You can find the Github code example here
What is Zeit "Now" ?
Zeit Now is a cloud platform for serverless deployment. It's an incredibly simple, easy to use platform that allows you to deploy anything from static websites to server/serverless application instantly, scale automatically, all with minimal configuration.
This includes front-end applications (Angular/React/Vue/etc), or any backend of your choosing - Go, Node.js, Python and everything in-between!
NestJS is a Node.js framework after all, so how can we take advantage of an incredible Cloud platform like Now, and deploy our applications ?
Getting setup
NOTE: In this demonstration, we'll be showcasing a new NestJS application generated by the CLI, but if you prefer to use an existing NestJS application - feel free - and just skip ahead !
Generate a new NestJS Application
For demo purposes, let's make sure we have the latest NestJS CLI installed - and create a New application.
☁ npm i -g @nestjs/cli☁ nest new PROJECT_NAMENow let's cd into the newly created directory and open up our IDE. At this point we have a simple generated NestJS Application.
Setting up Zeit Now
# Install the Now CLI☁ npm i -g nowMake sure you're logged into the Now CLI (or create an account before logging in).
☁ now login# enter email & passwordOk great! We have a "hello world" NestJS application & Now setup, where do we go from here?
Configuring Zeit Now for NestJS
Typically with Now, deployments are as simple as typing now in your terminal.
But that alone won't work for our NestJS application.
Now lets you configure your Deployment Configuration via a now.json file (typically found in the root of a project).
Now.json configuration
With this now.json configuration file, we can control many aspects of our deployment:
- Deployment / Project Name
- Aliases (ie: your domain URL)
- Build setup
- Routing
- Serving static assets
- much more...
At the root of your application, create a now.json file and add the JSON code below.
- Note: You can set
namebelow to whatever you would like
{ "version": 2, "name": "nestjs-now", "builds": [ { "src": "dist/main.js", "use": "@now/node" } ], "routes": [ { "src": "/(.*)", "dest": "dist/main.js" } ]}What is this configuration doing?
- Builds
- On the line
"use": "@now/node", we are telling the Now builder to take the filedist/main.jsas an entry point for a Node.js function, building its dependencies, and bundling them into a Lambda. - Let's remember that at the end of the day, NestJS compiles down to JavaScript and runs like a standard Node.js server
- By default NestJS is using Express behind the scenes, but it can optionally be switched to use Fastify.
- More info on @now/node here
- On the line
- Routes
- We want to make sure that all routing
/(.*)is handling by the API routes we setup within our NestJS application, so we're just telling Now where our main file is. - More info on Now routes here
- We want to make sure that all routing
Building & Deploying
Now that we have everything setup - let's Deploy it to Now!
NestJS is a TypeScript-based Node.js framework, so we're going to need to make sure we build it for Production (via npm run build) and then we can let Now do its thing (via now) !!
☁ npm run build && now# ---------------------# example output# ---------------------> zeit-now-nestjs@0.0.1 build /Users/Documents/Trilon/zeit-now-nestjs> tsc -p tsconfig.build.json> Deploying ~/Documents/Trilon/zeit-now-nestjs under trilon-io> Using project nestjs-now> Synced 2 files (462.27KB) [2s]> https://nestjs-zeit.now.sh/ [v2] [928ms]> Ready! Aliased to https://nestjs-zeit.now.sh/ [in clipboard] [43s]NestJS deployed to the ☁ !
If you look above (or in your terminal if you're following along), we can see there was a URL outputted in the terminal! It was automatically copied to our clipboard, so go ahead and open up a Browser and take a look!!
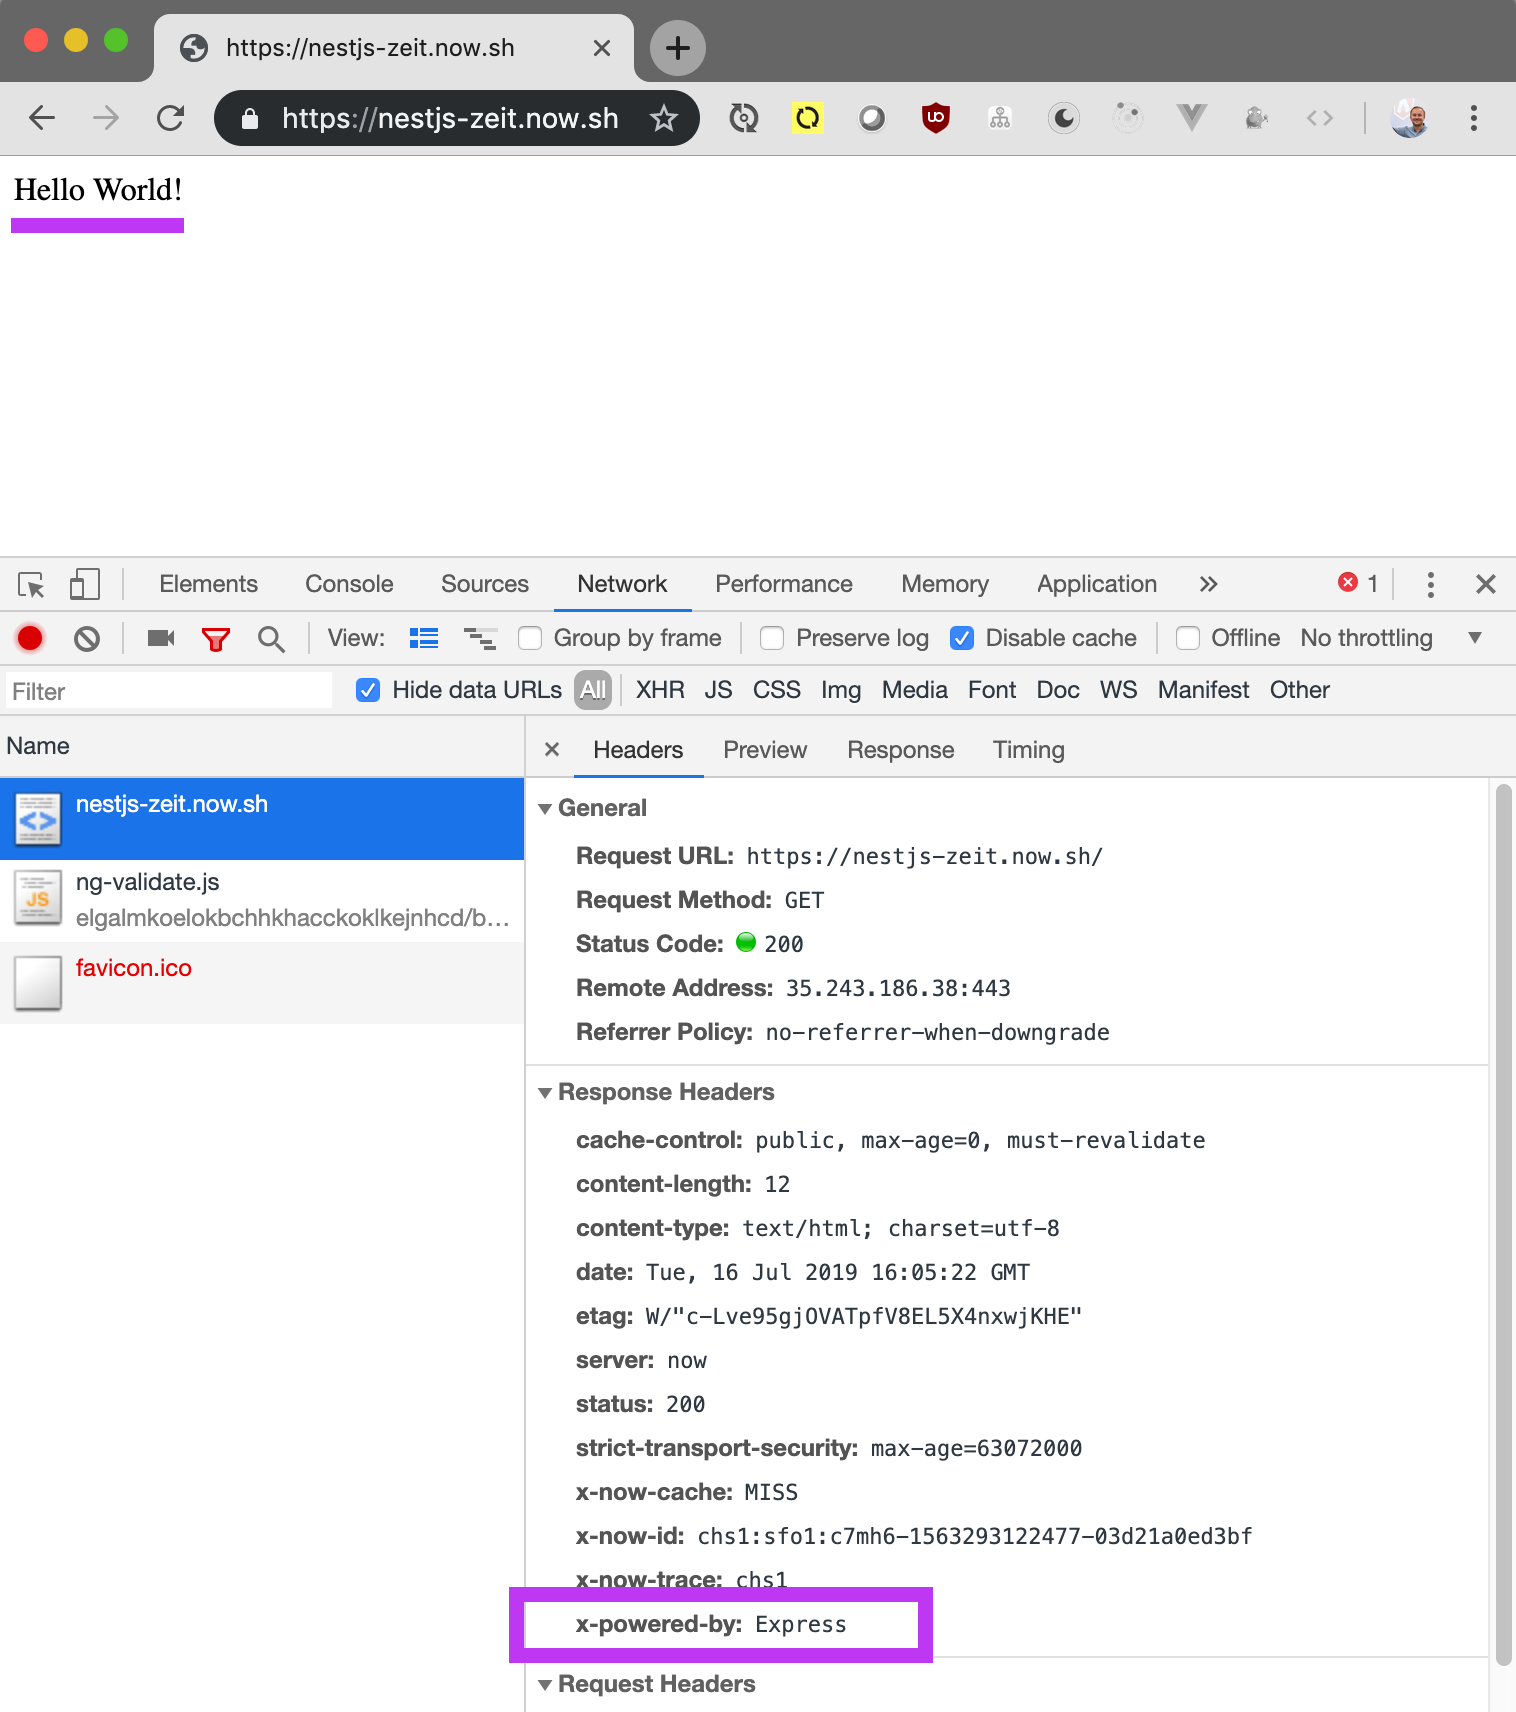
"Hello World" in all of its magical glory...

NOTE: Inspecting the page itself we can see that it was infact served up by an Express server, just as a default NestJS application is setup to do!
There we have it!
In just a few minutes and one small json file - we took our NestJS application to the cloud with Zeit Now!
See the "Hello World" NestJS + Zeit Now live demo:
NestJS-Zeit.Now.sh
You can find the Github code example here
In Conclusion
- Now makes deploying our NestJS applications to the cloud even simpler.
- Make sure your scripts are building your NestJS before deploying.
- Setup your
now.jsonto be configured for NestJS builds. - Enjoy the ☁ responsibly!
Learn NestJS - Official NestJS Courses 📚
Level-up your NestJS and Node.js ecosystem skills in these incremental workshop-style courses, from the NestJS Creator himself, and help support the NestJS framework! 🐈🚀 The NestJS Fundamentals Course is now LIVE and 25% off for a limited time!
🎉 NEW - NestJS Course Extensions now live!
- NestJS Advanced Concepts Course now LIVE!
- NestJS Advanced Bundle (Advanced Architecture and Advanced Concepts) now 22% OFF!
- NestJS Microservices now LIVE!
- NestJS Authentication / Authorization Course now LIVE!
- NestJS GraphQL Course (code-first & schema-first approaches) are now LIVE!
- NestJS Authentication / Authorization Course now LIVE!


